FREE USA SHIPPING on all orders over $100

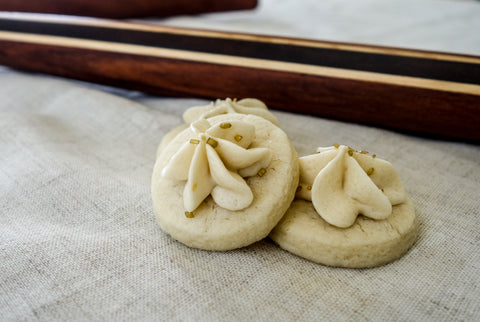
As you can imagine, everyone in the shop is hustling and bustling to keep up with the holiday season. The elves are busy packaging utensils to be sent to destinations worldwide while the makers meticulously craft each spoon, cutting board and rolling pin with the utmost care. On a day such as this, to my delight, Brad approached me and said, “We should make my Mom’s cookies.”

Note the coffee stains from Brad's dad- that's real custom work!
As Brad described the cookies, my mouth began to water. He claimed he could eat an entire batch on his own- and that’s big talk in these parts! A few days later, after scheduling the event with Grandma Earlywood, we were on our way.
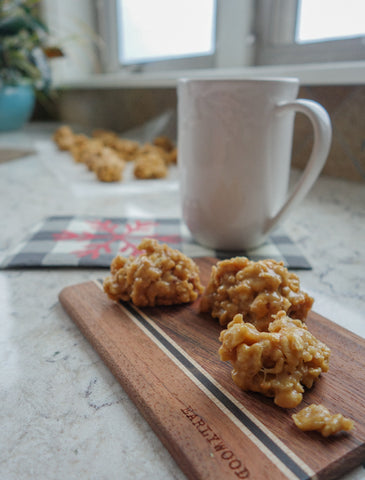
Now, these cookies are a sort of hybrid cookie-treat bar sculpted into bite-size shapes. Think somewhere along the lines of a scotcheroo- sweet, salty, crunchy yet chewy- all the good things.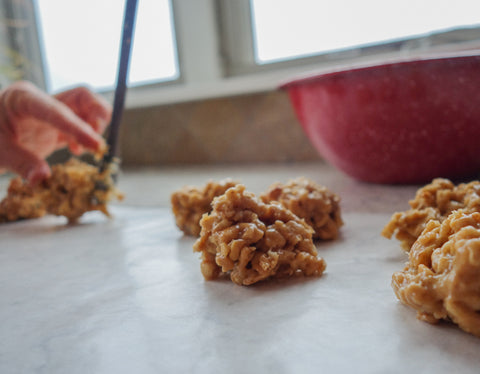
Brad has been enjoying these nuggets of deliciousness since he was a child and after sampling them myself, I am positive I will be sharing them at family gatherings, potlucks and school fairs to come.
This recipe is uncomplicated, straightforward and blue collar. While addicting as is, and absolutely perfect in Brad's mind, don't be afraid to try with other cereals.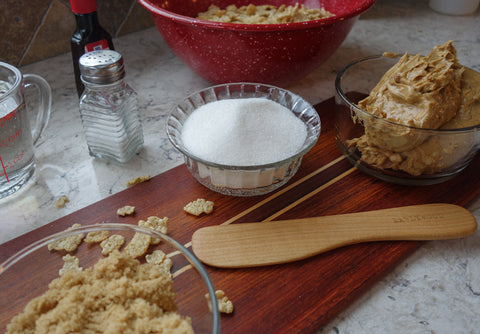
Grandma Earlywood’s Cookies
Ingredients
-1 C sugar
-1/2 C brown sugar
-1 C Karo syrup
-2 tsp vanilla
-1/4 tsp salt (or a couple shakes from the shaker as Grandma Earlywood does)
-12 oz. peanut butter
-5 C Special K cereal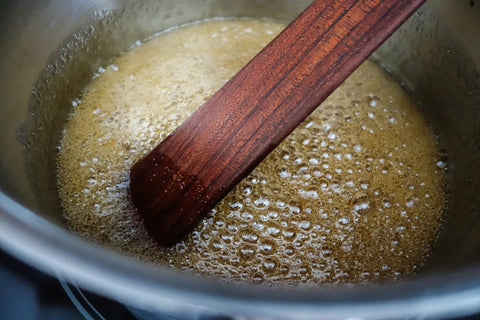
Directions
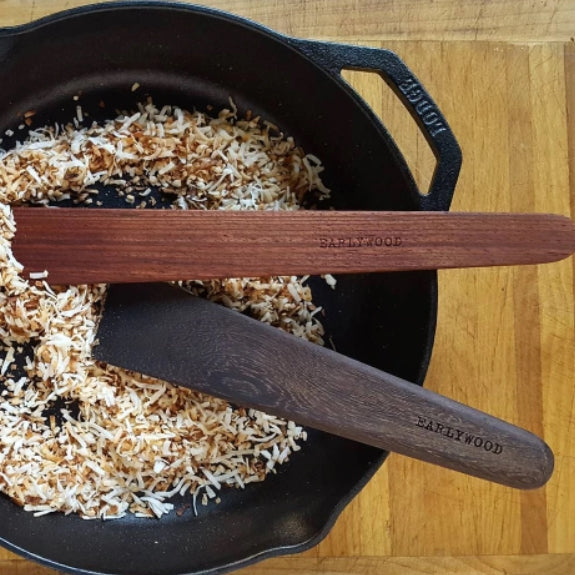
-Combine sugars and Karo syrup in sauce pan over medium heat; stir constantly
to avoid burning using an Earlywood Saute utensil. Bring to a low boil for 10 seconds then remove from heat.
-Add vanilla, salt and peanut butter using a Large Spreader. Stir to combine until smooth and creamy.
-Pour peanut butter mixture over Special K in mixing bowl. Stir until evenly
coated.
NOTE: Combine the sugar mixture and cereal quickly as the mixture becomes hard to stir as it cools.
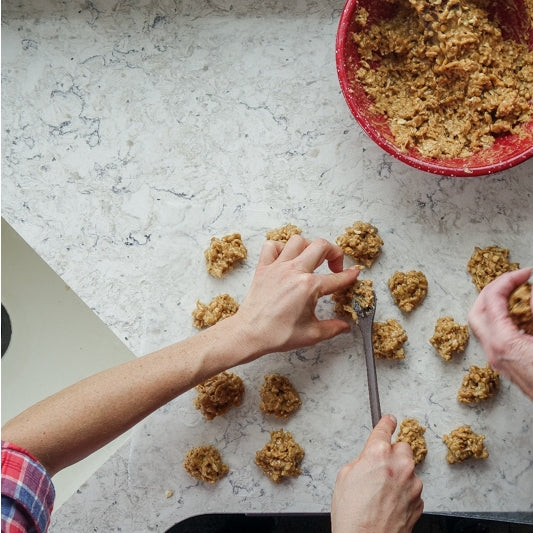
-Our Tasting Spoons happen to work well to scoop the mixture onto cookie sheet lined with parchment paper. Gently form into balls or cookie shapes and let cool.
That’s it! So easy, so addictive! We recommend doubling or tripling this recipe as these nuggets of goodness disappear rapidly. They also store well in the freezer for emergency sweet tooth cravings.
Leave us a comment below and let us know what you think!
Pumpkins, pumpkins everywhere. From the fall farmer’s markets to the Thanksgiving table, pumpkins represent all that is right and good in the world. They are adorable! They make Halloween possible! They are magical (just ask Cinderella)!
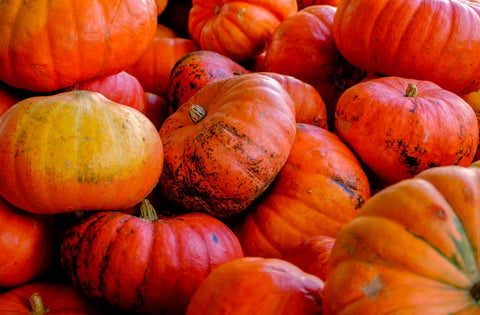
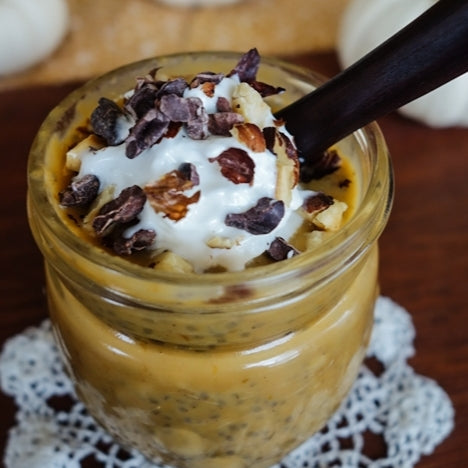
Besides these facts, pumpkins are super healthy. A serving of pumpkin contains 197% RDA of vitamin A along with a ton of potassium and vitamin C. To temper less waistline-friendly dishes (my friend's pumpkin bread made with Crisco) with healthier options, I’ve been enjoying this Pumpkin Pie Chia Pudding as a healthy, tasty alternative.
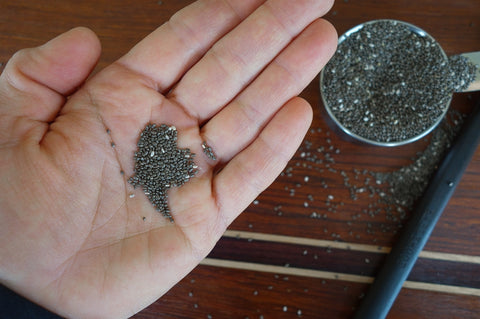
Chia seeds have been all over the news and yes, they are the same little seeds we grew up growing trendy pets out of. Turns out, they are nutritional powerhouses with high amounts of fiber, protein, calcium, manganese, magnesium, phosphorus and B vitamins. Furthermore, these babies contain only 137 calories per two tablespoons!
The nutritional profile of chia seeds paired with pumpkins’ superpowers equals one thing: improved health. The combo of pumpkin and chia seeds encourage all the important things and discourage the other, less-savory states of being. Think lower instances of heart disease, more energy, improved bone health, reduced inflammation. If you ask me, it’s pumpkin chia pudding all day, every day!
Follow this recipe if you want to enjoy some healthy deliciousness including fall’s favorite flavors.
Pumpkin Pie Chia Pudding
Ingredients
1 C pumpkin puree
1 ½ C favorite milk (dairy, cashew, coconut…)
1 tsp. vanilla extract
3 Tbs. pure maple syrup
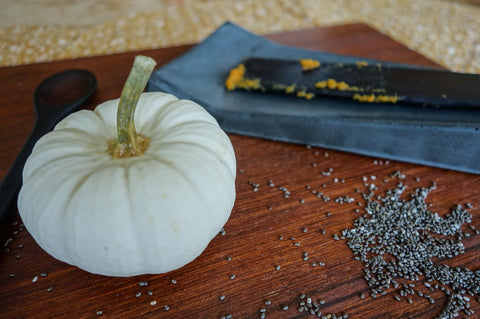
¼ C chia seeds
½ - 1 tsp pumpkin pie spice
Directions
-Mix all ingredients vigorously in medium size bowl using an Earlywood Saute tool. (I prefer the small size for my small hands).
-Pour into 3 small glass containers or mason jars. Refrigerate overnight or until pudding is set.
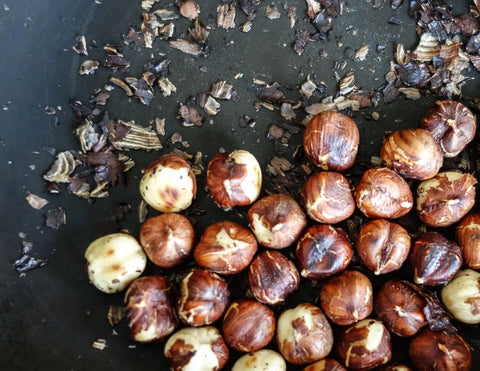
-Top with toasted hazelnuts, whipped cream, cacao nibs, cinnamon or another favorite. Enjoy with an Earlywood Toddler Spoon or Tasting Spoon!
If you’d like to enjoy chia seeds in other ways here are some suggestions: sprinkle on salads, add to oatmeal or quinoa, stir into cookie dough, blend in your favorite smoothie. Note that chia seeds take on a gel-like consistency when mixed with liquids, hence the reason they make a perfect pudding.
Have you tried this recipe? Let us know what you think in the comments below.

A few months back, while trolling food blogs, I came across a site called Citrus Tree Kitchen. When the homepage opened I immediately knew I had hit the jackpot- recipes for cinnamon buns and baba ghanoush on the same page?!? Who was the genius curating such a collection? I had to read more…

I found exploring Citrus Tree Kitchen a true journey for the senses. Browsing the recipe index, developed by the multi-talented Ananda Edelstein, will undoubtedly leave your mouth watering and stomach growling. Ananda’s recipes are thoughtfully created to reduce waste and encourage seasonal, vegetable-based eating. In a nutshell, Ananda’s recipes are the right kind of healthy; the kind that tastes amazing, fills you up and nourishes you from the inside out. These recipes are like the ones you would find dog-eared, hand-written and smudged with coffee from years of use, with a slightly updated twist.
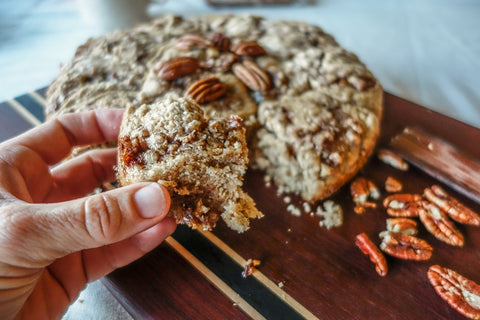
Now back to those buns. I am an absolute sucker for cinnamon rolls. I have tried to recreate my mom’s recipe, which she, of course, knows by heart, without much luck. The yeast-free recipe from Citrus Tree Kitchen for whole-wheat cardamom & walnut buns seemed right up my alley. I was able to whip these buns up in no time and am enjoying one while typing this… so good!
Whole-wheat cardamom pecan buns
makes 12 buns
Ingredients:
Filling:
1 cup walnuts, chopped (I used pecans as I had them on hand)
5 Tbsp. unsalted butter, melted, plus more for greasing pan
½ cup coconut palm sugar or organic sugar, plus more for dusting
1 tsp. ground cardamom
1 tsp. ground cinnamon
½ tsp. fine sea salt
Dough:
1½ cups whole-wheat flour, plus more for dusting
½ cup all-purpose flour
3 tbsp. coconut palm sugar or organic sugar
1 tsp. baking powder
½ tsp. baking soda
½ tsp. fine sea salt
¼ tsp. ground cardamom
¾ cup almond milk or milk of choice
2 tbsp. fresh lemon juice
2½ tbsp. unsalted butter, melted
1 egg, beaten
-Grease 10” cake pan and preheat oven to 350 F.
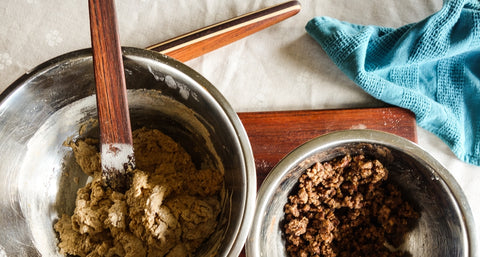
-Combine all ingredients for filling and mix well using one medium flat sauté.
-Whisk together flours, sugar, baking powder, baking soda, salt, and cardamom for dough. Mix milk, lemon juice, and butter together; slowly add to dry ingredients. Knead dough on floured surface several times then roll into a 12”x8” rectangle using a French rolling pin.
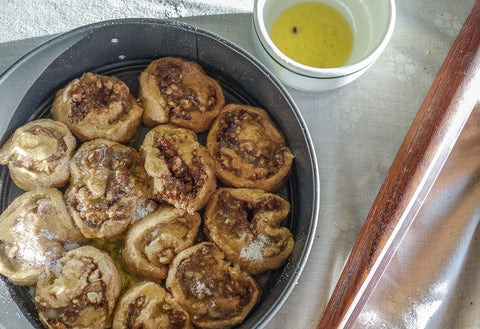
-Spread filling onto dough leaving a 1” border on the long edges. Gently roll dough away from you forming a log then slice into 12- 1” pieces.
-Place dough in greased pan leaving room in between each portion. Beat one egg and brush onto buns. Dust lightly with sugar if desired. Bake until golden brown.
I hope you enjoy these hearty, tasty treats!
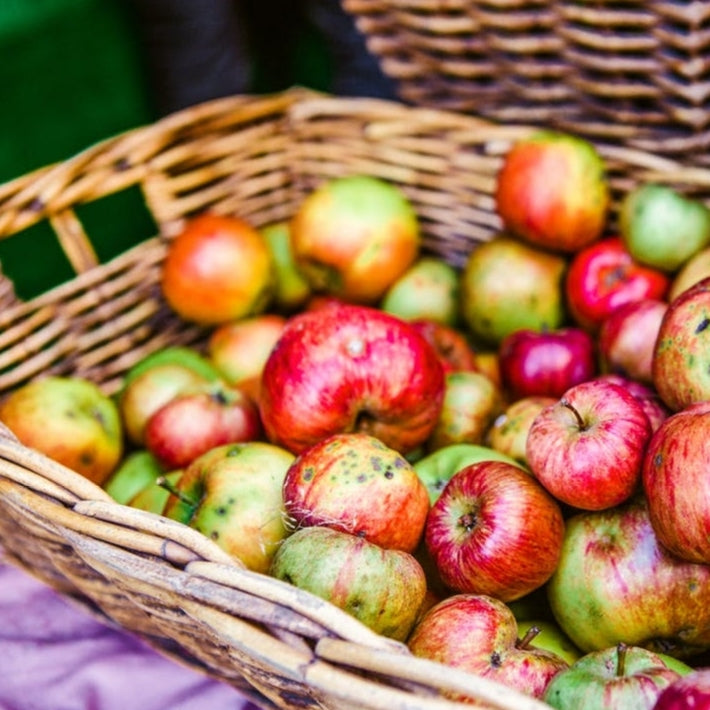
A recent cold snap and the beginning of a new school year have me thinking about all things fall. The air has changed from August’s oppressive blanket of smoke-tinged haze to the brighter, invigorating panacea of September’s skies. And while the early release of Starbucks's pumpkin spice latte has left a less than cinnamon-sweet taste in my mouth, I can’t help but look forward to our annual apple picking trip at Papa Mark's house.
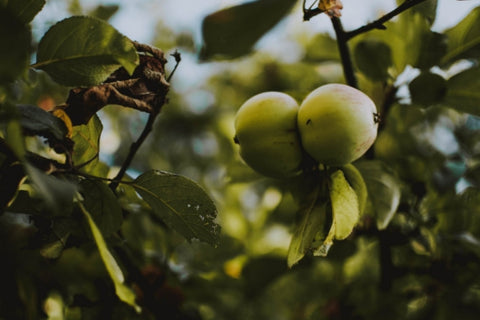
(Photo: Kaboompics)
Apples come off as such a seemingly simple piece of produce- available year-round in every market across the land, including those tiny rural groceries where iceberg lettuce still holds ground as an acceptable salad green. Despite being overshadowed by the season’s hyper-marketed gourds, apples maintain a storied past. Having traveled to the Americas with European settlers after thousands of years of cultivation in central Asia, apples have made their way into our lives as the most uncomplicated snack food ever; buy, wash, eat.
The cultural, religious and mythological importance of apples abounds. Greek goddesses quarreled over the fruit in the time preceding the Trojan War and we all know how Adam and Eve’s insistence on taking just one bite of the forbidden bounty turned out.
The apple’s significance to pop-culture continues the fruits’ legendary affliction of innocent bystanders. Snow White, Charlie Brown and Carrie Bradshaw experienced their share of bad apple-ing while Sir Isaac Newton rocked the science world with his apple-induced contemplation of gravity. Apple Records and The Big Apple round out the pomme’s famed references (I am determined to deny Apple, as in the mega corporation taking over the world, any more PR).

(Photo: Wikipedia, Howe's Historical Collection)
Finally, we must discuss the folkloric hero and original man-about-town, Johnny Appleseed. Sprouted from humble colonial roots, this larger-than-life character was born John Chapman in 1774. Heading to the western frontier as a young man (Ohio, Indiana, Pennsylvania at the time), the legend of Johnny Appleseed stars the imposing frame of the 6 foot+ man who wore a tin pot for a hat and considered shoes non-essential. Planting nurseries from seed rather than through traditional grafting methods, Johnny Appleseed fed a population thirsty, rather than hungry, with his produce. You see, the apples produced by Johnny’s trees were prime for cider production, the fruit’s mainstay in the early 19th century. And here we are, packing the fruit in lunches and pretending they will replace fries at the local fast food joint; bring on the cider!
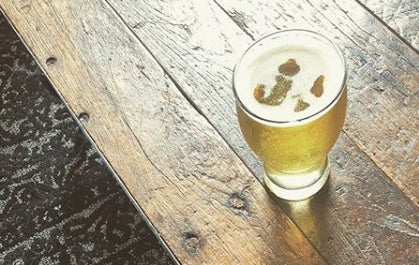
(Photo: Last Chance Cider Mill)
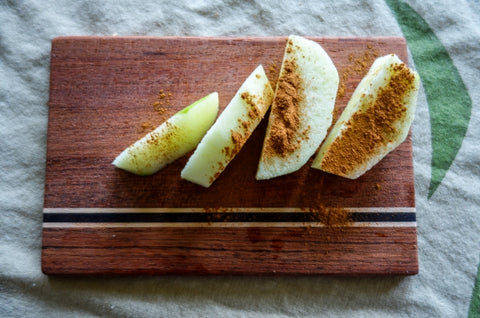
In honor of the fall apple harvest, here are 10 facts about apples to help you brush aside contemporary cravings for overplayed pumpkin recipes in favor of a hardy, historical treat.
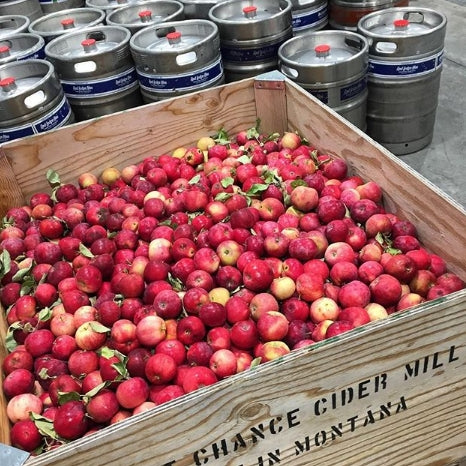
(Photo: Last Chance Cider Mill)
While we love our pumpkin muffins, pies and yes, sometimes our pumpkin spice lattes, this fall, remember to give yourself a chance to enjoy an apple or two. We promise you won’t regret it.
(Cover photo:ama-m.weber)
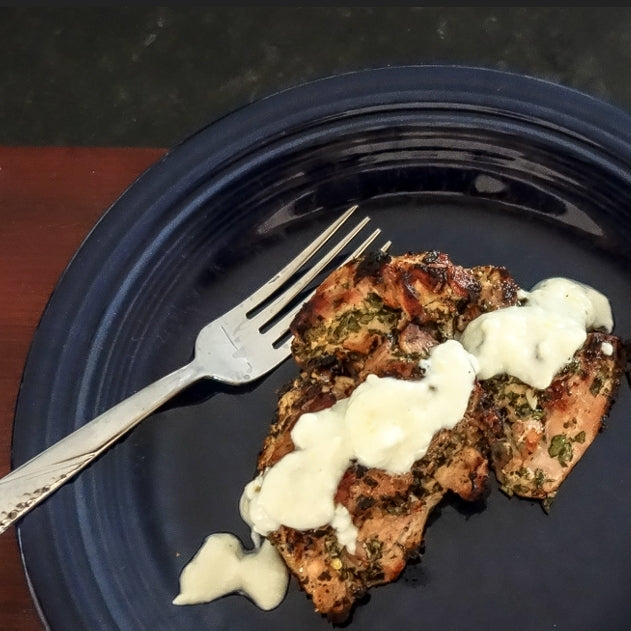
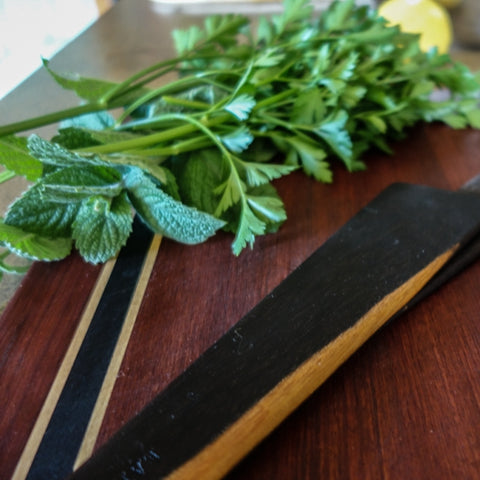
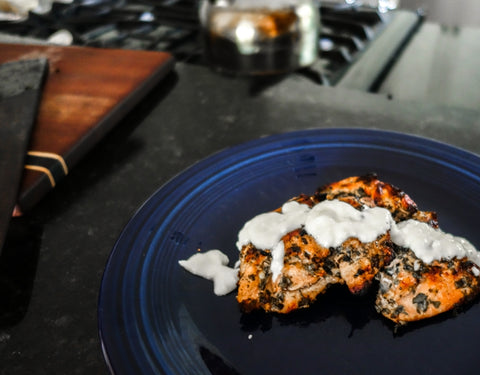
Before work, before the kids wake, often before the sun rises, early mornings are, for me, all about a hot cup of coffee and The New York Times where I invariably find my way to the Books, Travel and Food sections. Recently I read about this chicken dish and I’ve not been able to stop thinking about it since. So, I finally gathered all of the ingredients and tried it. Despite neglecting and slightly charring a few of the pieces as I savored samples indoors, the chicken turned out delicious! Even my daughter who is quite picky asked for seconds (finally we're eating adult food!). The recipe is easy to prepare and doing so is a delight for the senses. I would like to take extra credit for the delicious flavors as the herbs were all organically grown in my garden. Let us know what you think.
A few notes on my adaptations of this recipe:
And then there are the Earlywood tools one needs for this recipe: I’ve taken to using my l flat sauté whenever I barbecue. It allows me to easily move the food around on the grill and flip it off the moment it’s ready. For stirring (and almost everything else), the tera scraper is my new best friend.
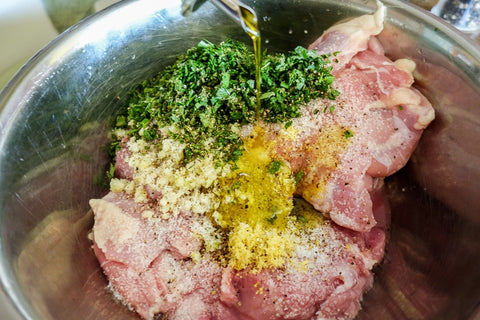
Ingredients
Earlywood Ingredients
Instructions
Bon appétit!
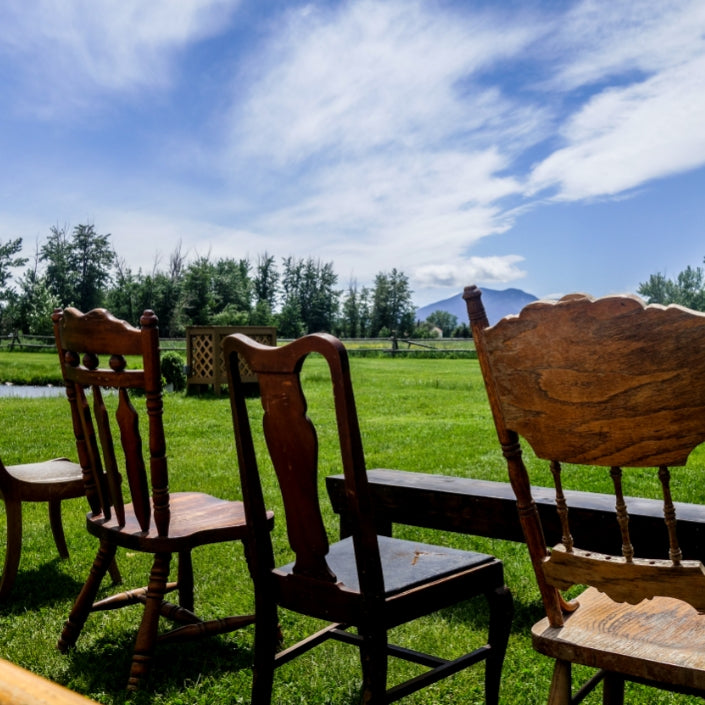
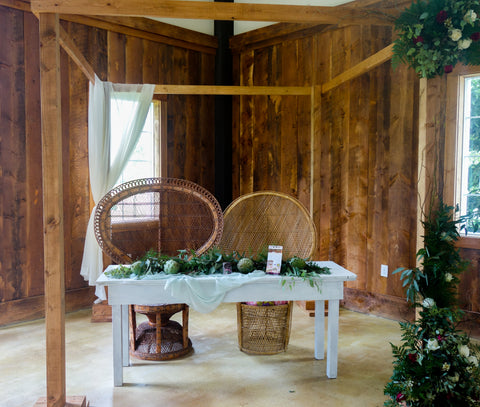
Getting married soon? Know someone who is? Our friend Crystal Gordon, lead consultant at Montana Wildflower Weddings gave us her top 5 tips for a successful wedding.
You are newly engaged to the person you’ve literally dreamed of and waited for your whole life. Soak yourself in the joy of it all, tell everyone, show off that shiny bling and ride that cloud- well, for a while at least. Once the fairy dust settles, take a step back and gather your wits. Planning your magical day without losing yourself (or your partner) in the process requires a full set of senses! Here are some tips to help get started:
BUDGET. This is my number one for a reason. Regardless of circumstances or where the moola is coming from, putting together a budget is the first, right step to take! Starting a budget is super simple! Create a spreadsheet (or use one from the internet) then gather some basic intel: who is paying for what? are parents or other family members contributing? how much do you and your beau have to spend? Break down the incoming funds before you focus on where money will be spent.
GUEST COUNT. The obvious, understated rule: your guest count will literally drive every part of your wedding from start to finish. Take time to sit down with your partner over a cup-o-joe and put together a guest list. It won’t be pretty or terribly accurate but you’ve gotta start somewhere. Since many venues have a maximum capacity, it’s smart to have a ballpark idea of how many people will be attending before you make any inquiries. And, by the way, as badly as you want to invite your first best-friend-ever from 2nd grade you haven’t seen in 17 years because they moved nine states away…yeah, maybe think twice about that. Don’t feel compelled to invite everyone you’ve ever known, focus on the people most important in your lives.
VENUE. Whether it’s a backyard, the family farm, a destination getaway, or the Ritz Carlton: choose the venue that best suits the overall vision of your wedding day. This is one of the toughest choices to be made but essential as all the other details depend upon the location. Start calling or emailing venues, request information, schedule tours (the fun part!), and ponder the pros & cons of each place. You are sure to succeed in finding a venue that is the perfect fit!
PRIORITIZE. Back to that budget you started. Now that you have an estimate of guests who will be attending, do yourself a gigantic favor: Spend your money on what is most important to you and your partner! If you want jaw-dropping pics of your wedding day, choose an amazing photographer. If you’re a foodie, spend more of the budget on hiring that insanely talented caterer. And obviously, if your greatest desire is for your guests to be talking about the splendor of your uniquely fabulous venue for years to come, call me (wink, wink).
DON’T LOSE FOCUS. The most important part of this is to make a concentrated effort to keep your MARRIAGE a priority over your wedding!!! I know, I know. You can’t believe those words are coming from a wedding planner. My passion is for couples to have the best marriage possible, not just the best wedding day. If you want your marriage to last longer than your 15-minute ceremony or that 1-year old freezer burned cake…make sure the future you are planning with the love of your life is the ultimate goal. NEWSFLASH: you and your partner two will spend the remainder of your days on earth experiencing life together through all things good, bad, and ugly. Doesn’t it seem shrewd to learn how to navigate rocky waters beforehand?! Ask a wiser, walked-thru-the-fire married couple to mentor you or consider pre-marriage counseling to work out any kinks beforehand.
Planning a wedding can be wildly overwhelming if you let it. Don’t get so caught up in being a bride for a day, that you forget you are a bride for LIFE. After all, love is an action…a choice you’ll make from this day forward.

There are some truths and a lot of myths out there about wooden cutting boards. This is part 1 in a series of 3 blog posts I’ll be releasing on the topic. I’ll take some time to debunk some popular beliefs about them and shed some light on these three topics in particular:
- How to choose a good cutting board
- How to care for your cutting board
- How to fix a warped cutting board (if you didn't follow the first two!)
Sign up HERE to make sure you are the first to know when we release new products and useful information.
Recently I was having a conversation with some customers at a craft fair about the best way to flatten a warped or cupped cutting board; it became obvious that there are a lot of old wives’ tales and confusion about the best way to do so. (It reminds me of many a conversation about the proper way to wash, use and season a cast iron pan)! So, I thought I'd take a minute to set the record straight, specifically on why we suggest the “turn it over” method and why this super simple method works.
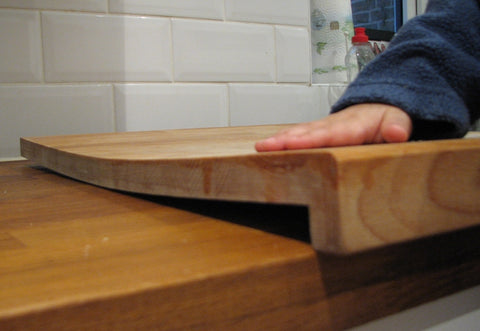
- This cutting board has seen better days - but could still be flattened!
Let’s assume that you have a warped board. Warping takes place because your board wasn't built properly, or has not been properly cared for. What to do? There are a lot of crazy suggestions out there. Here are a few that I have heard during conversations:
Iron method – put a wet towel over your board and iron it.
Steam method – steam one side of your board over a pot of boiling water.
Force and water method – soak the board in water, then set it under a bunch of weight until it’s dry.
Grass and sun – lay your board in some wet grass and let the sun beat down on the top.
Take it to a woodworker – take it to your neighborhood woodworker and have them fix it.
And here is our suggestion:
Just turn it over! – turn your cupped board over so the convex side is facing up (so it is resting on the 4 corners and the middle of the board is raised off of your counter) and leave it there until it is flat. It sounds too simple to work, but there is a lot of science behind this super simple method!
To shed some light on why we think this is the best method for flattening a cutting board, let’s talk about why boards cup in the first place. Cupping occurs because the moisture content on one cutting face is different than the other. This is the same thing that happens when you set a kitchen sponge on the counter and one side dries out before the other - it cups. This is the same thing that happens when mud dries faster on the top surface than on its bottom surface - it cups. It's also what happens when you leave a cutting board flat on a countertop and the top dries more than the bottom - it cups!
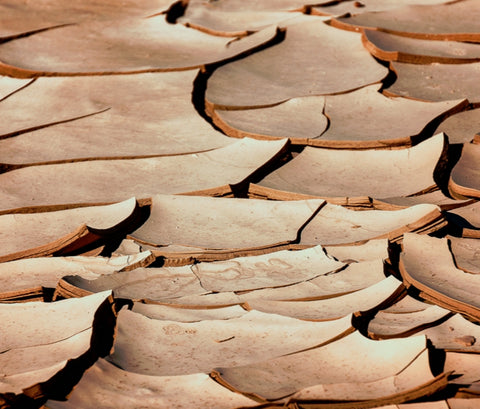
- Cupping seen in nature
When one surface of a board, piece of bread, sponge, or mud dries, it shrinks. Conversely, when a surface soaks up water, it expands. This contraction and expansion causes cupping. This 2” thick piece of wood, for example, when totally dry, measured 3 7/8" across both the top and bottom. After one night of sitting in a shallow pan of water, the top still measures 3 7/8”, but the bottom now measures 4" across and the board is visually cupped!
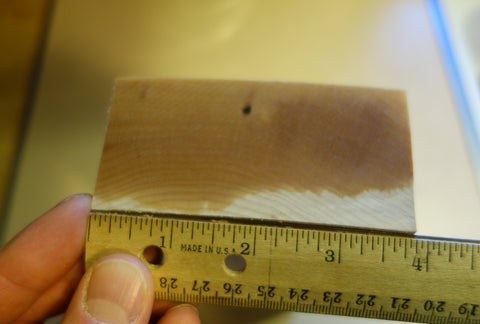
- Dry wood board width - 3 7/8"
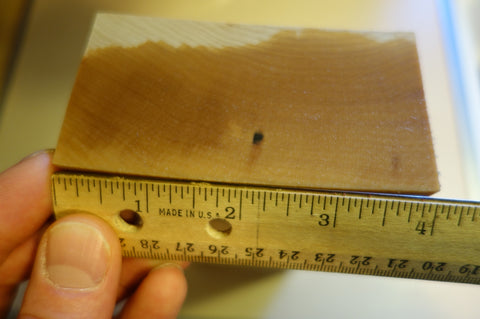
- Wet wood board width - 4"
This visual cupping is only across 4" of board. Imagine if you did this to a cutting board that was 4 or 5 times that wide; you could almost eat cereal out of your cutting board! A side note... did you think you could eliminate cupping by buying a super thick cutting board? Think again.
While our method is similar to the examples given in the opening of this post, those techniques can be bad for your cutting board. Heat and moisture methods have a tendency to flatten your board in the short term but return to their warped state shortly thereafter. Applying unnecessary heat or moisture to your cutting boards causes internal stress in the wood eventually making them weak or breakable. I admit it, woodworkers aren't the solution to all your problems either!
If you have a cupped cutting board, skip the iron, skip the steam, skip the grass, skip the trip to the wood shop (although that would be fun) and simply turn your board over. Exposing the damp side of the board to air evens out the moisture content allowing your board to flatten back out. While this method may take a few days, or weeks in the worst cases, it remains the gentlest, most permanent way to flatten a warped cutting board.
Here are some pictures from a recent test I conducted using the "turn it over" method. It works amazingly well!
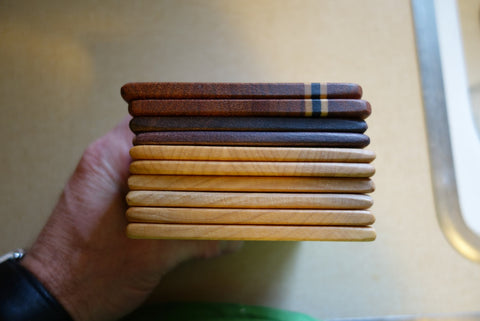
- Stack of 1/4" thick cutting boards fresh from the woodshop
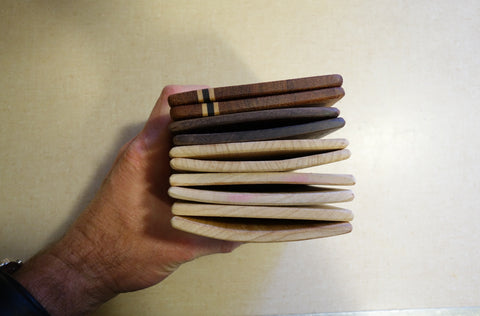
- the same boards after a 12-hour soak in a shallow pool of water.
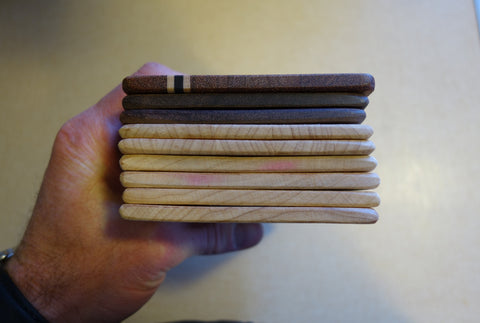
- The same stack of cutting boards after drying out for about a week.
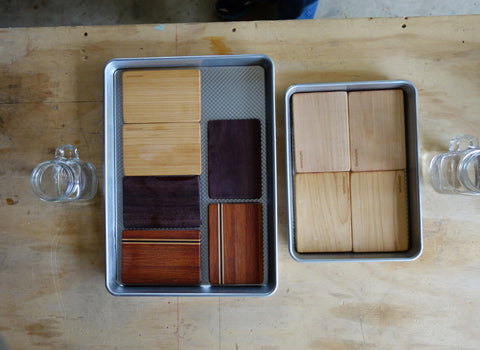
- Hey Charlotte... No baking cookies until my experiment is done!
The boards went all the way back to flat with no heat, no pressure, and no extra water.
After your board dries and flattens out be sure to follow our best practices for caring for your cutting boards.
Be sure to let us know how this method works for you.
Please share or Pin if you know someone who could benefit from this info!
“What is the best oil to treat wooden utensils and cutting boards with?”
It’s a question we get every time we are out selling Earlywood products and it’s easy to see where the confusion comes from. There are old-fashioned treatments and modern oil blends that all claim to be the best way to preserve wood used in the kitchen. So let’s take a look at your options for treating wood, and clear up the confusion.
There are essentially two kinds of oil used for treating wood, oils that harden, and oils that don’t harden.
Oils that harden, including polyurethane and varnish are basically what you’ve got on your furniture. Based on smell alone, it should be obvious why they are not good for anything that comes into contact with food, yet we do occasionally see people use it. It creates a shell around the utensil that, with use, will eventually crack and chip off in your food. Not good, friends. Not recommended.
Oils that don’t harden, include food-based oils, linseed oil, tung oil, and petroleum-based oils. These all offer safer protection, but they’re not all equal.

Food based oils like olive, corn, vegetable, and canola oils will never dry and chip off into your food like hardening oils, but they can discolor your utensils, thicken, and go rancid, giving your spoons and cutting boards a rotten smell. Have you ever see an old cutting board that someone is selling at a garage sale that is yellow and sticky on the surface? It is that way because they most likely treated the board for years with one of these food-based oils. These oils are especially troublesome when used on counter top cutting boards that don’t get a thorough washing very often.
An exception to the typical food-based oils, is walnut oil. It’s widely recommended because it doesn’t go rancid. It dries, unlike the other oils in your kitchen. However, it can still get a tacky feel. If you’re a believer in walnut oil, be sure to apply it only to utensils you use – and wash – often. That should help keep it from developing a thick, sticky coating.
Another option is tung oil. It does a good job. It will dry, which will keep it from going rancid, and it shouldn’t create a sticky buildup, but to get a proper coating you’ll need to spend 7-10 days coating and drying.
We should also mention beeswax. It’s a safe option. It will give you a shiny smooth surface and be essentially waterproof. This sounds like a good thing, but the problem is that it is hard at room temperature, and as soon as you dip that treated spoon into a hot dish, the wax immediately melts into your food, thus losing most of its protection. Beeswax is often blended with mineral or other oils and is dubbed as “spoon oil”. We have found that the addition of wax to mineral oil only thickens the oil, makes it harder to apply and restricts the depth to which it can soak in. Therefore, we’re not huge fans.
So, we’re down to petroleum based oils, and within that category is our recommendation for treating your utensils, mineral oil. Mineral oil gets a bad rap from time to time because it is petroleum based. If you are anti petroleum products, that’s your thing and that’s just fine. We’re not here to convince you otherwise, we’re just here to tell you what works best for oiling wooden spoons!
Mineral oil has a lot of great qualities when it comes to treating wood that will be in contact with food. Here are a few of its benefits:
- It’s 100% food safeWe specifically recommend a low-viscosity mineral oil for the task. Viscosity refers to the thickness of a liquid. On one end of the spectrum you have high viscosity liquids like hydraulic fluid and the other end of the spectrum you have very low viscosity oils like WD-40. The mineral oil that we use and sell on our website is lighter than water and penetrates deeper into the wood than thicker oils. We add a little lemon peel oil, which has antimicrobial properties and you get to enjoy the refreshing lemon scent while you oil your spoons.
We hope that clears things up for you a bit. Now, go oil your utensils and cook something great!


